Showing posts with label Tuesday Tips and Techniques. Show all posts

Tuesday, November 20, 2012

Tips and Techniques - Making a Mat for Your Framelits

Today's Tips and Techniques video show you how to make a mat for your Stampin' Up! framelit dies.  This techniques lends itself nicely to the Apothecary Accents framelits.


I used this technique on a Birthday card.  In fact, the main image is double mounted as I created 2 mats.

Stamps: Serene Silhouettes (c – 127324, w – 127322, p. 75 2012/13 Annual Catalogue), Teeny Tiny Wishes (c - 127802, w- 115370 p.133 2012/13 Annual Catalogue), Memorable Moments (c – 126682, w – 126680, p. 139 2012/13 Annual Catalogue)
Paper: Naturals White, Blushing Bride (retired), Riding Hood Red, Whisper White, Twitterpated DSP
Ink: Riding Hood Re, Basic Grey
Accessories: Big Shot, Apothecary Framelit Dies, Lacy Brocade Emboss Folder, Pearl Jewels Riding Hood Red Pleated Ribbon (retired), Word Window Punch, Modern Label Punch, Scallop Trim Corner Punch


You will also notice that the Blushing Bride card stock uses another technique.  This technique uses the Lacy Brocade Embossing Folder almost like a letterpress.

I will be doing a Tips and Techniques video on this at a later date.

If you have any questions, please EMAIL me.

Don't forget about the Stampin' Up! Extravaganza that is happening today until November 26th.  Don't miss the great deals.


Is your paper crafting wish list bigger than your bank account?

Do you live in an area where you don't have access to a stamping club?


Watch the Video that will explain how you can benefit from the Simply Said Online Stamping Club


Karen


Tuesday, November 13, 2012

Saving Money on Crafting Papers

Saving paper is important to a paper crafter.  

It is efficient, saves money and  storage space.  How often do you end up with these little scraps and then either throw them out right away or save them and then throw them out at a later time.

Today's video shows you how to used almost every last piece of a sheet of Festive Prints designer papers.


Stamps: Petite Pairs (c -122497, w – 122495, p. 134 2012/13 AC)
 Paper: Natural Whites, Island Indigo, Festive Prints DSP
Ink: Early Espresso
Accessories: Big Shot, Holiday Ornaments, Pearls, Festive Paper Piercing Pack, Paper Piercing Tool, Pierce Mat, Victoria Crochet Trim

Whoops!  I was over zealous with my editing and  I left too much on the cutting floor!

Before attaching the card front to the base, paper pierce around the ornament using the Festive Paper Piercing Pack.

How are you at saving your paper?  


Is your paper crafting wish list bigger than your bank account?

Do you live in an area where you don't have access to a stamping club?


Watch the Video that will explain how you can benefit from the Simply Said Online Stamping Club


Karen


Tuesday, November 6, 2012

Tuesday Tips and Techniques - Frost White Shimmer Paint.

This is the final video in the series on "Ways to Use Stampin' Up! Shimmer Paint".  The focus today is on the Frost White Shimmer paint

Shimmer Paint is fun to use and adds that little bit of extra to a card or a gift.  Give it a try and if you have other ways to use this paint, leave a comment on my blog to give me your idea.  I would love to hear from you.


Stamps: Frosty Friends (w – 128117, p. 9 2012 Holiday Catalogue), Merry Messages (retired)
Paper: Whisper White, Gumball Green, Cherry Cobbler, Snow Festival DSP
Ink: Black Stazon
Accessories: Big Shot, Adorning Accents Edgelits, Markers: Cherry Cobbler, Pumpkin Pie, Baja Breeze, Gumball Green, Frost White Shimmer Paint, Aqua Painter, White Gel Pen, Versamark, Cherry Cobbler Embossing Powder, Heat Gun.

Don't forget the awesome INKREDIBLE promotion for hostesses or joining the Stampin' Up! family


Is your paper crafting wish list bigger than your bank account?

Do you live in an area where you don't have access to a stamping club?


Watch the Video that will explain how you can benefit from the Simply Said Online Stamping Club


Karen


Tuesday, October 30, 2012

Tuesday Tips and Techniques Champagne Shimmer Mist

It's Tuesday and time for a Simply Said with Karen video.  This week, I am continuing with the Stampin' Up! Shimmer Paints and giving you different ideas for using them in your card making or other paper crafts.

Today, the focus is on the Champagne Shimmer Mist.  This particular shimmer mist is so pretty and so very subtle that you can use it on all different types of cards.  It's just not for Christmas where we tend to bling up our cards.

First, though, before we get to the video, I would like you to see the card that I made from last week's sample on the Platinum Shimmer Mist

Not only did I want you to see the card completed after using the Platinum Shimmer Mist, I also wanted you to see how you can change the colour of the Silver Glimmer Paper.  

To change the colour, use an Aqua Painter Brush and pick up Baja Breeze reinker and literally paint the Silver Glimmer paper.  It does take a bit to dry so you can either let it dry naturally or take a heat gun to it.  I would be careful with the heat gun as the heat may damage the glimmer paper


Stamps: Lovely as a Tree (c – 127793, w – 115027, p. 54 2012 Annual Catalogue), Border Banter (c - 128930 w- 128927 p.20 2012 Holiday Catalogue)
Paper: Natural White, Whisper White, Baja Breeze, Candlelight DSP, Silver Glimmer
Ink: Lucky Limeade, Baja Breeze
Accessories: Big Shot, Perfect Polka Dots Folder, Versa Mark, White Embossing Powder, Aqua Pen, Platinum Shimmer Paint, Stamp-a-ma-jig


Here is the card using the Champagne Shimmer Mist.  It is hard to see the glimmer and the shimmer but it is there.

Stamps: SnowflakeSoiree (c - 127925 w- 127922 p.5 2012 Holiday Catalogue)
Paper: Very Vanilla, Soft Suede, Candlelight DSP, Champagne Glimmer
Ink: Soft Suede
Accessories: Champagne Shimmer Mist, Spritzer, Soft Suede Marker, Itty Bitty Shapes Punch Pack

Now the video which shows you 2 ways that you can use the Champagne Shimmer Mist.


How do you use your Shimmer Paints?  Leave me a comment and let me know.


Is your paper crafting wish list bigger than your bank account?

Do you live in an area where you don't have access to a stamping club?


Watch the Video that will explain how you can benefit from the Simply Said Online Stamping Club


Karen


Tuesday, October 23, 2012

Tuesday Tips and Techniques - How to use Shimmer Paints

A few weeks ago, I wrote a post on this Christmas card where I used Stampin' Up! Platinum Shimmer Paint.


Today, I have a video that shows you how I used the Platinum Shimmer paint and created shimmer and dimension on the tree.


As always, if you have questions on this technique, EMAIL me and I will answer your questions.


Is your paper crafting wish list bigger than your bank account?

Do you live in an area where you don't have access to a stamping club?


Watch the Video that will explain how you can benefit from the Simply Said Online Stamping Club


Karen


Tuesday, October 16, 2012

Tuesday Tips and Techniques

Finally, I have made it back with a Tuesday Tips and Techniques video.  

Today, I tried replicating the Raised Star in the Stampin' Up! Holiday Catalogue.  I have seen different ways of doing this star from using a template to folding origami style.

Because I often like to challenge myself, as I am sure others do, I opted to try the origami method to make the star.

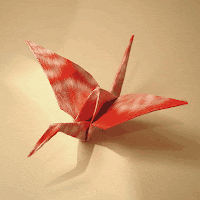
Origami is the art of folding paper, a traditional Japanese art.  Origami is hundreds of years old and it is popular with so many people.  One of the pieces that you will see quite often is the crane.


Here is my version of the Raised Star


As always, if you have any questions, please EMAIL me


Is your paper crafting wish list bigger than your bank account?

Do you live in an area where you don't have access to a stamping club?


Watch the Video that will explain how you can benefit from the Simply Said Online Stamping Club


Karen


Tuesday, August 28, 2012

Tuesday Tips and Techniques

Did you know that tomorrow, August 29th is the anniversary of the release date of the movie Mary Poppins?

Mary was a magical person and and in 1964 entered the Bank's family by floating down on an umbrella.  Mary was always handing out tips, for example, in the song, "A Spoonful of Sugar Makes the Medicine go Down".  And remember the "Supercalifrailisicexpidalidocious"?  You just got to love Julie Andrews.

Today's tip is one for your Big Shot and dies.  The tip makes your life easier and provides less interruption to your crafting time.  Having to measure your die to see what size paper you need so as not to have too much waste can be a pain.

So, hopefully, this week's tip will free up some of your time. 


As always, EMAIL me if you have any questions.


Coming September 1 - Simply Happy Rewards Program


Is your paper crafting wish list bigger than your bank account?
Do you live Canada and don't have access to a stamping club?

Photobucket

Tuesday, August 21, 2012

Tuesday Tips and Techniques - Stamp Organization

Craft room organization is just about the hardest thing to do.  Just when we think we get a system that will work, we find that sometimes what we thought was the best system in the world doesn't quite work.

I don't know how many times I have tried different systems but I am sure that I will need to do another one somewhere down the road.

Well, it's time for Tuesday Tips and Techniques and I have Part 1 for you this week.  I hope that it helps you with your stamp organization.

In this video, I take you through the steps of condensing 2 parts of a stamp set into 1 and having storage for your matching die cuts.

I also have a tip for you that will help those stamps stay on your clear mount blocks.


Give these ideas a try and I hope that you have success.  Next week, I have Part 2 which will be a "How To" for your Big Shot Die Cuts.

See you then.


Is your paper crafting wish list bigger than your bank account?
Do you live Canada and don't have access to a stamping club?


Photobucket

Tuesday, August 14, 2012

Tuesday Tips and Techniques - Paper Bows Part 2

Last Tuesday, I showed you how to make a flat paper bow.  I am back with another version of a paper bow. 

This one is quite similar to making a Pin Wheel. 

One of the ways to use a paper bow is to decorate a package or box.  I have used the bow on a card box that I can give as a gift.


This bow was made using the designer paper from the Pin Wheel Simply Scrappin' Kit.  My goodness but these kits go a long ways.  Value for your money!!!!

Here is the video on how to create this bow.

I hope you enjoy and try one of your own.


Remember, if you have any questions on today's video, please contact me.

Is your paper crafting wish list bigger than your bank account?
Do you live in an area of Canada where you don't have access to a stamping club?


Photobucket

Tuesday, August 7, 2012

Making a Paper Bow - Tuesday Tips and Techniques

Last year, Paper Bows became a hit in the paper crafting world and they continue to be one of hottest trends today.  You see all different shapes and sizes, colours and mediums for these bows.

The Paper Bows are great to decorate gifts....saves times from having to go and purchase a bow, that ultimately gets thrown out unless of course the recipient recycles their bows and ribbons.

Do you accumulate paper scraps from card making and scrap booking?  Here is a chance to use up those scraps that we store and eventually throw away.

So for those of us who love to paper craft, here is another way to get into your craft space and clean up the scraps.

I have for you today as part of the Tuesday Tips and Technique's video, Part 1 of Paper Bow Making.

This is a sample of a paper bow that we made as part of Make & Takes at Stampin' Up! 2012 Convention.

PS..the Kraft boxes make it an easy way to package your gift.  This one was stamped using Versamark and the Lovely and Lacy stamp set.  You can also decorate with designer series papers and card stock.  The choice is yours and there are so many.


So here is your video on How to Make Paper Bows.


I hope you  enjoy the bow tutorial.  Tune in for Part 2 next week.


Is your paper crafting wish list bigger than your bank account?
Do you live in an area of Canada where you don't have access to a stamping club?


Tuesday, July 31, 2012

Tuesday Tips and Techniques - How to Conquer 2-Step Stamping

Welcome to another session of Tuesday Tips and Techniques.

Do you know what 2-Step Stamping is or are you unsure as to how to do 2-Step Stamping?

This week, I have a video for you which will help you become a pro on using the Stamp-a-Ma-Jig to accomplish 2-step stamping.  The Stamp-A-Ma-Jig's power is unleashed.

In this video, I use the clear mount stamps which will work as well as the wood mount stamps.


Stamp-A-Ma-Jig Item #101049  $15.50


Yesterday on my post, I said there would be BLOG CANDY to celebrate my 1st Anniversary of retirement.


Leave a comment on my blog from today until the end of Thursday.

On Friday, I will randomly select someone's name and they will receive this spool of Raspberry Ripple Ribbon and post the winner's name on my blog. The ribbon is one of the new In Colours and it's beautiful.

I am only able to send the ribbon to a Canadian address.  If you have a non-Canadian address and your name is chosen, I will send you this beautiful card that I used in the video.


Stamps: Joyous Celebrations (c – 128069, w – 129066 p. 7 2012-2013 Holiday Catalogue)
Paper: Whisper White, Gumball Green
Ink: Gumball Green, Early Espresso, Cherry Cobbler
Accessories: Big Shot, Holiday Frame Emboss Folder, Bitty Banners Framelits, Cherry Cobbler Scallop Dots Ribbon, Champagne Mist Shimmer Paint, Rhinestones.

The embossed area is sponged with the Champagne Mist Shimmer Paint and adds to the elegance of this card.

Is your paper crafting wish list bigger than your bank account?
Do you live in an area where you don't have access to a stamping club?

Join the Simply Said Online Stamping Club!!


Tuesday, July 24, 2012

Tuesday Tips and Technqiues - Adhesive Sheets

Last week, the Tuesday Tips and Technique video showed how to use Stampin' Up! Adhesive Sheets to apply glitter to stamped images.

Today, I will show you how to use Stampin' Up! Adhesive Sheets to turn paper/fabric die cuts into stickers.

This technique is great for cards, scrap booking and/or decor and so easy.

These are transportable so you could prepare a number of die cuts and have them stuck to the Adhesive Sheets and peel them off when you need them.  Great idea for kids or a quick project.

Have fun and if you have any questions, please contact me by email.


Here are the last few pictures from Convention 2012.  When I packed my suitcases to come home, it was touch and go at the airport...it's a good thing I have a portable scale...because I got one of those "heavy" stickers on my suitcase.

SWAG - (stuff we all get)

Canada Inks Up Swap Cards displayed on the Card Tree available from Momento Hall

Momento Hall Goodies

MDS2 (My Digital Studio)...new software version available August 1, 2012
 Now you can see why I got the heavy sticker (LOL)

Is your paper crafting wish list bigger than your bank account?
Do you live in an area where you don't have access to a stamping club?

Until next time...


Tuesday, July 17, 2012

Using Stampin' Up! Adhesive Sheet to Apply Glitter

 Welcome to Simply Said Tuesday Tips and Techniques and today's topic is using Stampin' Up!'s Adhesive Sheets.

Sometimes it's great to apply glitter to a stamped image and how do you do that the easiest way.

I have found that Stampin' Up!'s Adhesive Sheets are an excellent way to accomplish the application of glitter to a stamped image.

This is the card where I used this technique.  Other details on this card can be found on this post.

Using Adhesive Sheets to Apply Glitter to Stamped Image
This is an easy technique, no mess, no fuss.


Adhesive Sheets are a versatile tool as they will turn almost anything into a sticker. 

Shop my Online Store for this product. 

I hope that you will give this technique a try.  Leave a comment to tell me how you did.


Is your paper crafting wish list bigger than your bank account?
Do you live in an area where you don't have access to a stamping club?

Then, the Simply Said Online Stamping Club is for YOU!!

Until next time....


Tuesday, July 10, 2012

Tuesday Tips and Techniques - Tie a Bow

Do you have difficulty tying a bow for your paper crafts?  You are not alone, as most people find that to tie a bow is somewhat frustrating.

I know that I had difficulty and tried various techniques and this one that I found as turned out to be the life-saver when it comes to tying a bow. 

The Tuesday Tips and Techniques focuses on helping you to overcome that frustration and who wouldn't like to get at list one frustration off their plate. 


Tie A Bow Tutorial
I hope that this works for you.


Is your paper crafting wish list bigger than your bank account?
Do you live in an area where you don't have access to a stamping club?


Until next time.....


Tuesday, July 3, 2012

Faux Gold For a Unique Look

 It's Tuesday and that can only mean it's Tuesday Tips and Techniques.

Today I am going to show you how to get the Faux Gold Metal look using Versamark and Gold Embossing Powder.

One of the stamps sets that I am really intrigued with is the Clockworks.  I think that if you are looking for the Grunge look, then this stamp set is for you.  It would also be good for a vintage look as well.


Stamps: Clockworks (c – 127292, $21.95 w – 127290, $28.95 p. 105 2012-2013 AC), Elements of Style (c – 120045 $24.95 w – 118611, $33.95 p. 113 2012-2013 AC)
Paper: Naturals Ivory, Chocolate Chip, Lucky Limeade, International Bazaar DSP
Ink: Chocolate Chip, Lucky Limeade
Accessories: Big Shot, Argyle Emboss Folder, Gold Brad, Versamark, Gold Emboss Powder, 1/2” Circle Punch, 1-1/4” Circle Punch, Sponge

This card also features the new Argyle Emboss Folder, which can give a real masculine look to a card.


Try this fun technique.

Is your paper crafting wish list bigger than your bank account?
Do you live in an area where you don't have access to a stamping club?

Then, the Simply Said Online Stamping Club is for YOU!!


Until next time...


Photobucket

Tuesday, June 26, 2012

Tuesday Tips and Techniques


New Program Launch Tomorrow.  Check back to see what it is.

Here's some interesting trivia for you...

On June 27, 1859, the song "Happy Birthday" was sung for the very first time.  So let's all hear it for "Happy Birthday" ...Hmmmm I wonder how many times it's been sung.


Welcome to another session of Tuesday Tips and Techniques.

Today, I have posted a video to demonstrate the technique of water colouring with Stampin' Up! classic inks, water and the Aqua Painter.

This is a very easy technique and it has real oomph (is that a word) to use on cards, scrap book pages or 3 -D projects.


Incorporate this technique into your next project...Maybe a Birthday card

Until next time...


Photobucket